Are you are a new brewer thinking about getting into all-grain brewing? Are you an experienced brewer looking to fit some mid-sized batches into your flow? This is the place to learn about equipment needed to get started with Stovetop BIAB.
If you have not read it yet, I recommend you take at my first article in this series. It gives some overview information about why I am such a fan of Stovetop BIAB brewing and 2.5 gallon batches. Once you are done, come back and learn about the equipment needed.
Basic Brewing Equipment for Stovetop BIAB
This section lists the basic brewing equipment needed to brew beer. For the most part, there is really specific here to Stovetop BIAB or to 2.5 gallon batches covered here.
Starter Equipment Kit
Starter kits have most of the items need for brewing any size batch of beer. I have priced out the pieces individually and found that purchasing a starter kit saves a little money over purchasing individual pieces. If you are getting started, this is the route that I advocate. If you already have the basic brewing equipment for brewing 5 gallon batches, then you can jump forward to more 2.5 gallon batch specific equipment.
Unlike some hobbies where the beginner kits contain cheap items that you will soon throw away, I have found that most brewing kits contain quality items that suit most brewer for years.
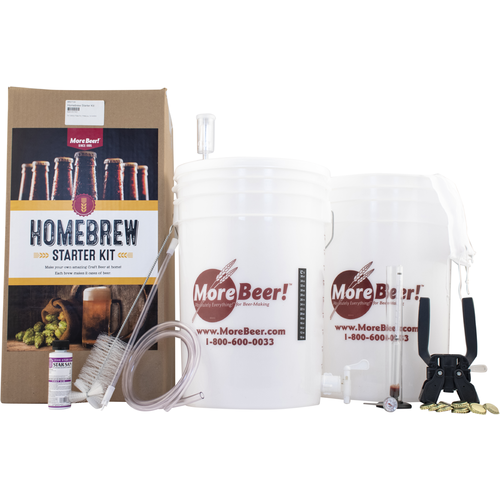
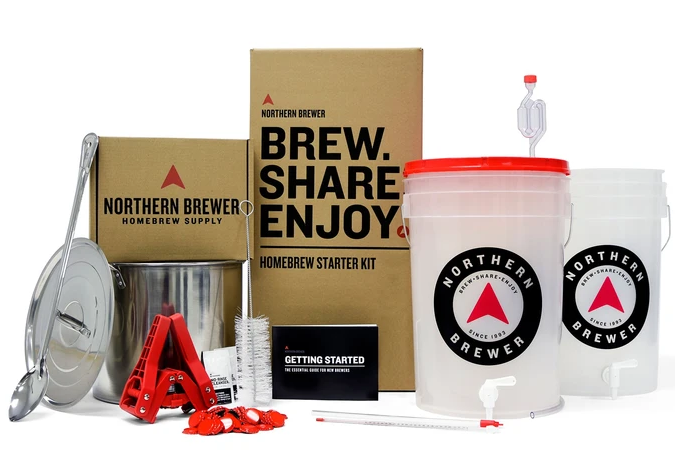
In this section I take a look at starter kits from MoreBeer and Northern Brewer. Most online retailers have similar kits. I don’t have an affiliation with either company, though I have purchased products from both in the past. I picked these as examples of common starter kits.
Most local homebrew shops will also sell a similar starter kit. Purchasing from a local shop is a great way of supporting a community business. Your local shop may be invaluable when you need that last minute item for a brew day. Most are also a great resource for brewing information. Even if they cost a few dollars more, be sure to consider them with your purchases.
| Item | MoreBeer | Northern | Notes |
|---|---|---|---|
| Fermenter Bucket | Yes | Yes | Both with spigots and air lock; larger than ideal for 2.5 gallon brewing |
| Bottling Bucket | Yes | Yes | Both with spigots |
| Hydrometer | Yes | Yes | Both with test jar |
| Thermometer | Yes | Yes | Likely a good area to upgrade to a digital or long stem analog. |
| Bottle Filler and Tubing | Yes | Yes | |
| Bottle Capper & Caps | Yes | Yes | Both include caps for 5 gallons |
| Bottle Brush | Yes | Yes | |
| Cleaner and/or Sanitizer | Yes | Yes | Likely just enough to get started |
| Mesh Bags | Yes | Useful, often come with kits | |
| Long Handled Spoon | Yes | A stainless steel spoon a very handy item | |
| Kettle | Yes | 5 gallon stainless | |
| Ingredient Kit | Yes | Pick one 5 gallon extract kit | |
| Price | $70 | $110 | Approximate price as of Feb 2021. |
This kits are very comparable and will likely be very comparable to other mail order kits or kits sold at your local homebrew shop. The Northern Brewer kit contains a 5 Gallon Kettle, a stainless steel spoon, as well as ingredients to brew a 5 gallon batch of extract. The kettle looks pretty cheap, but will get the job done. You can use any sturdy spoon, but I would advocate a stainless steel spoon that is easy to sanitize for stirring after the boil. As far as the extract kit, this article is about 2.5 gallon all-grain, but I advocate starting out brewing a few batches of extract.
In both kits, the Fermenter Bucket is really the only piece of equipment that is not needed for 2.5 gallon BIAB brewing. It can be used in a a pinch or if you just want to give 2.5 gallon brewing a try.
So in summary, if you are a new brewer, I advocate you start with a basic brewing kit designed to brew 5 gallon extract batches. The other option is to obtain the items listed above individually.
Other Brewing Equipment
The following items might not be critical, but they are items that can be very useful.
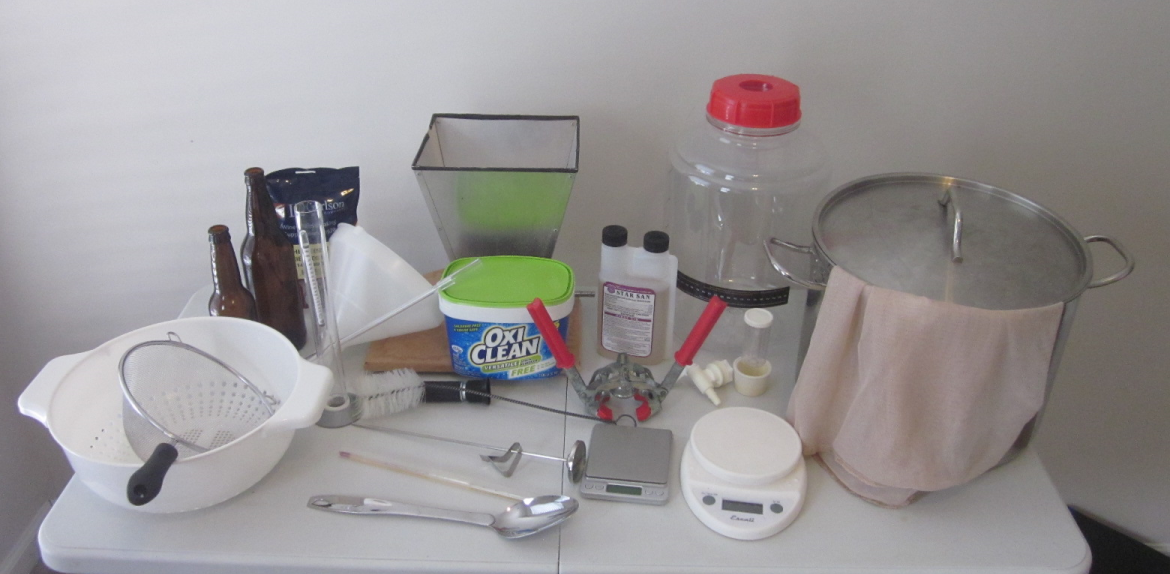
- Scale: You may have a kitchen scale that will work fine. For measuring grains you need a resolution of about 1 oz, for hops about 0.1 oz (or 1 gram), and for water chemistry salts about 0.1 grams. I use a standard kitchen scale with a 10 lb. capacity for grain, and I use an inexpensive jeweler’s scale for measuring hops and water salts.
- Long Handle Stainless Spoon: If your kit does not have one or you don’t have one around the house, I would recommend you pick up a sturdy stainless steel spoon. You can find these for around $5 to $8 at department stores. Stainless steel is easy to clean and sanitize for use on the cold side but any spoon is fine before and during the boil.
- Funnel and Strainer: Depending on your equipment and process, you might find these handy. I have a strainer/colander that I put over a bucket to help while letting my brew bag drain. I also may use a funnel with a metal strainer while transferring the chilled wort into the fermenter. Note that if used before boiling, any kitchen item can be used. If used after chilling I would recommend you have items dedicated to your brewing to ensure they are kept clean and sanitary.
- Thermometer: A quality and reliable thermometer can be a worthy investment. I use mostly a combination of a (reliable, inexpensive, but fragile) lab thermometer and a long stem dial thermometer. The long stem thermometer can clip to the side of my kettle and is very handy, where the lab thermometer is nice to calibrate/verify my dial thermometer. Digital thermometers can be found in the $10 to $100+ range. I tried an inexpensive digital thermometer and that one did not hold up to the damp conditions of brewing.
- Grain Mill: This is optional, but a recommended eventual upgrade. A full discussion of grain mills deserves a separate article. If you are unsure, I recommend you start out purchasing pre-crushed grain online or using the mill at your local shop. A decent grain mill will cost around $100 to $150 (maybe less if on sale or direct from China). I enjoy the convenience of milling my own grain and the extra efficiency gained from controlling my grain crush size. Corona-style mills made for grinding flour may work fine for BIAB where a fine crush is beneficial, but I do not have experience with these mills.
- Refractometer: A refractometer is used to take gravity readings. In some ways, it fills the same role as a hydrometer. A refractometer only uses a few drops of wort to take a reading and the sample does not need to be cooled. Calculations are needed to adjust readings taken in the presence of alcohol after fermentation starts. Refractometers are very handy for taking multiple measurements during the brewing process. You can get by with either a refractometer or a hydrometer, but I recommend both. Refractometers can be found online for under $20.
Stovetop BIAB Specific Equipment
5 Gallon Mash and Boil Kettle
If you picked up an equipment kit with a 5 gallon kettle, you are good to go. If you already have a 5+ gallon kettle, that should work fine. Note that in my case, my 10 gallon kettle will not physically fit on my stove under the overhead microwave. So I needed to switch to a smaller kettle.
On the inexpensive side, I have seen very thin stainless steel 5 gallon pots listed online for under $20. I have seen decent looking 5 gallon pots at the discount home goods stores for around $30 to $40.
For myself, I have enjoyed the quality feel of my 10 gallon kettle. It has a thick aluminum core bottom, sturdy handles, and quality side walls. I picked up a similar quality 5 gallon kettle off Amazon for around $60. At least so far, I have been very happy with my purchase.
How about a smaller kettle? There are ways to make kettles smaller than 5 gallon work for 2.5 gallon batches, but I advocate a kettle that is approximately 2 times the size of your target batch. The easiest path would be to tweak your batch size; so 2 gallons for a 4 gallon kettle.
BIAB Bag
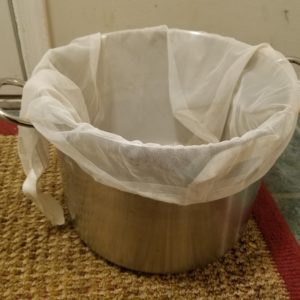
We are talking about Brew in a Bag, so you need a bag. With the popularity of BIAB, your local shop or favorite vendor should have a few to select from. Since 5 gallon batches are so popular, bags designed for larger kettles are common. A bag made for a 10 gallon kettle will work in your smaller one, but you will have extra material to deal with.
Your best bet is to measure your kettle and get one that is big enough to fit over the edges, but is not too big. I have been happy with a bag I purchased The Brew Bag and they have a variety of sizes. In addition, I have read good things about Wilserbrewer BIAB Bags as well, and he offers custom sizes. The bag that I use for my 5 gallon kettle came from my local brew shop, for probably around $10 (or maybe it is this one listed for $15).
3-ish Gallon Fermenter
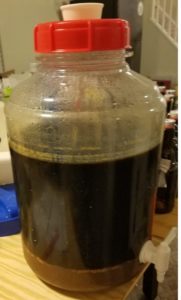
The small batch fermenter that I have hands on experience with is the 3 gallon Fermonster (link to MoreBeer listing). I have a pair of them. They work well for 2.5 gallon batches and also for splitting a 5 gallon batch into 2 fermenters. They will hold just around 3.25 gallons and I target around 2.6 to 2.7 gallons into the fermenter. I could see where a little more headspace would be nice, but a blow-off tube will handle an aggressive fermentation.
Since I moved to using Fermonsters with spigots (I also have a 7 gallon one), I have grown to appreciate the benefit of a spigot. They make it possible to bottle directly from the fermenter and easier to keg or transfer with limited oxygen exposure. They do add a potential vector for infection, so be sure to disassemble them for cleaning and sanitization.
What other options are there for fermenters suitable for 2.5 gallon batches?
- Your existing 6-7 gallon fermenter? The amount of headspace in a full sized fermenter makes me nervous. These could do in a pinch, but I would recommend a smaller fermenter.
- A 5 gallon bucket? Home improvement stores sell food grade 5 gallon buckets for around $5. Add a lid, a grommet, and maybe spigot. You now have an inexpensive fermenter, but it still has quite a bit of head space.
- 3 or 5 gallon glass Carboy? I fermented in glass carboys for years, and I am happy with my move to the PET Fermonsters. I have heard a lot of stories about injuries from broken carboys and about poor quality in many of the new carboys.
- FastFerment 3 Gallon Conical Fermenter? This thing just seems so unnecessary for a homebrewer and I have read about many issues with this brand.
- Speidel 12L / 3.2 gal Fermenter? Speidel has a good reputation and this looks to be a good quality fermenter with a size that is great for 2.5 gallon batches. It is almost twice price the cost of the Fermonster, but looks to be a strong contender. (link to MoreBeer listing)
- Ss Brewtech Brew Bucket Mini 3.5 gallon Fermenter? Ohhh, now we are talking. These look like great fermenters. You are talking about double the price of even the Speidel fermenters, but a quality stainless steel fermenter should last many years. (link to MoreBeer listing)
I suspect there are other options out there, and as I come across them I will try to cycle back and update the list. For under $25, the Fermonster fermenters are hard to beat in my book, but the Speidel and Ss Brewtech options look like quality upgrades.
Fermentation Temperature Control?
Note that I do not include any equipment related to fermentation temperature control. Fermentation temperature is a core aspect of making great beer. Some people will have a cool area (in the 65F range) that is great for fermenting ales. You might not be so lucky or you might want to ferment beers at lower or higher temperatures. In this case, additional equipment to heat and/or cool your fermenting beer may be needed.
Packaging
Packaging options are similar to other sized batches with bottling or kegging being the common options.
Bottling
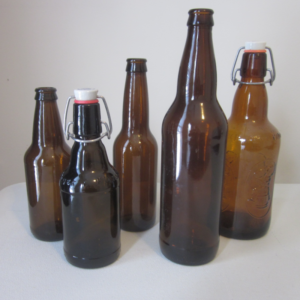
In addition to the bottling items listed in the Starter Equipment Kit section, you will need enough bottles to hold your batch. Depending on your exact volume, a 2.5 gallon batch will fill about a 24 case of 12 oz bottle (theoretical is 26.6 bottles). Various size of bottles work just fine, including flip top. You can purchase new, or reuse commercial beer bottles. Just be sure your bottles are made to store beer and are clean and sanitized.
Bottling can be done directly from the fermenter by adding a specific amount of sugar to each bottle, or transfer the beer to a bottling bucket and adding the sugar to the batch (being sure to stir well with a clean and sanitized spoon). You will use a bottling wand with a short piece of tubing to transfer beer into bottle. Then use sanitized caps and a capper to seal up the bottles. Swing-top bottle are also an option, in which case you can skip the capper and caps, though you may occasionally have to replace the bottle seals.
2.5 Gallon Kegs
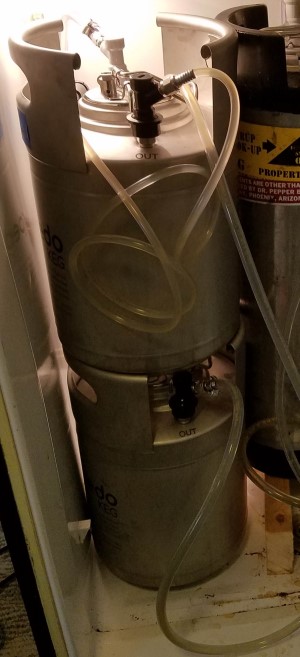
I splurged and picked up a pair of the 10L/2.6 Gallon kegs from Torpedo. They are a really nice product, but run around $80 each. As seen in the picture, they stack together into about the same space as a single 5 gallon keg, which works well for my beer fridge. A few other manufactures make small kegs as well.
The soda industry used 5 gallon kegs for years, and they can be found used. This is not the case with small kegs. New kegs tend to be about twice the price of used, and new 2.5 gallon kegs are nearly the same price as new 5 gallon kegs.
Besides bottling or spending your food budge on kegs, using standard 5 gallon kegs is an option. In that case, You would need to take extra care to purge the large headspace of oxygen. You also have to get over that feeling of starting with a half full keg of beer.
Maybe sometime in the future I will put together an article about small batch kegging options. When I looked around, the best fit for my needs, at a price point I could live with, were the Torpedo kegs.
Stovetop BIAB Equipment Recap
Let me just recap the core equipment needed for Stovetop BIAB Brewing to support 2.5 gallon batches:
| Item | Est. Cost |
|---|---|
| Starter Equipment Kit | $80 |
| 5 Gallon Kettle | $30 |
| Brew Bag | $15 |
| 3 Gallon Fermonster w/ Spigot | $25 |
| Optional Items | $50 |
| Total Cost | $200 |
I estimate that for around $200, you can get all the equipment needed to brew 2.5 gallon batches of high quality all-grain beer. At this budget level you won’t be able to fit in a grain mill or kegs, but there is some wiggle room to add in other optional items. Also, you may already have some of these items. If you are an experienced brewer, even if that means just a few batches under your belt, you might just need to spend the $70 for the kettle, bag, and fermenter.
I firmly believe that with this equipment, a decent recipe, and some knowledge, anybody can produce excellent beers on par with any system. Yeah, those shiny $3K stainless steel systems with multiple kettles, electronic controller, and pumps look cool, but there is no reason you cannot make comparable beers with this kit.
Also keep in mind the things that you do not need. Most 5 gallon brewing systems will require a propane burner or a 220 volt electric heater. Some systems use multiple heat sources. These batches are designed for a standard kitchen stove. Also, while an immersion chiller is helpful, this size batch can be chilled in a kitchen sink with some ice.
While this could be an all-grain starting point before moving on to 5 gallon or 10+ gallon batches, for many people a 2.5 gallon batch is a great fit. The kit described in this article could be everything they need.
The next articles in this series are out! Read along to understand how the equipment is put to use to brew a batch of beer and watch the video walkthrough as I put the equipment to work to make some beer.

Glad I found your site. I really appreciate the time you have taken to document and publish all of this valuable information. Still going through it all, and see what I can learn before I attempt a biab brew. I have brewed several batches of extract and partial mash recipes and although some of it is very good, seems I can always tell its “homebrew”. I really want to get my first biab brew going so I can see if it is of better quality and taste.
Thanks for letting me know you got use from the articles. While I do think you can make very good beers with extract, it depends on using very fresh extract and, even then, you are a bit limited on what grains and ingredients you can easily use (especially without adding in a partial mash). All-grain opens you up to an array of fresh base malts.
I tend to think that other sources of “homebrew taste”, besides older extract, are from fermentation (make sure you pitch enough healthy yeast and control fermentation temps, I am a big fan of dry yeast), and from oxidation (this shows up a lot more in hoppy beers).
Thanks for putting so much time into this series on 2.5-gal batches. I started out with 1-gal extract brewing pretty recently, but you and others have convinced me that 2.5-gal BIAB is my eventual goal. For now, as I explore more styles, techniques, and scale, I’ll make sure the new equipment I buy is future-proofed for building 2-2.5-gal BIAB (again, your blog is helping me considerably there)
Forgive me if you’ve already written on this and I haven’t found it yet, but do you have any advice for dividing and preserving 5-gal kits (say, partial mash w/ DME) to brew in two batches? Everything seems to be nitrogen-flushed for good reason, but I’d like to be able to buy in bulk and portion it out as I’m ready, without seriously affecting the end result. Thanks again!
It is not something I have experience with. It would depend a bit on how the kit is packaged and how easy it is to break into smaller portions. Also, how long it will take to use up the ingredients. If the store lists the exact contents of the kit, it might be easier to order ingredients separately. There are only a handful of stores I have seen with mid-sized kits. Love2Brew and Gnome Brew are two.